Follow Me On Social Media!
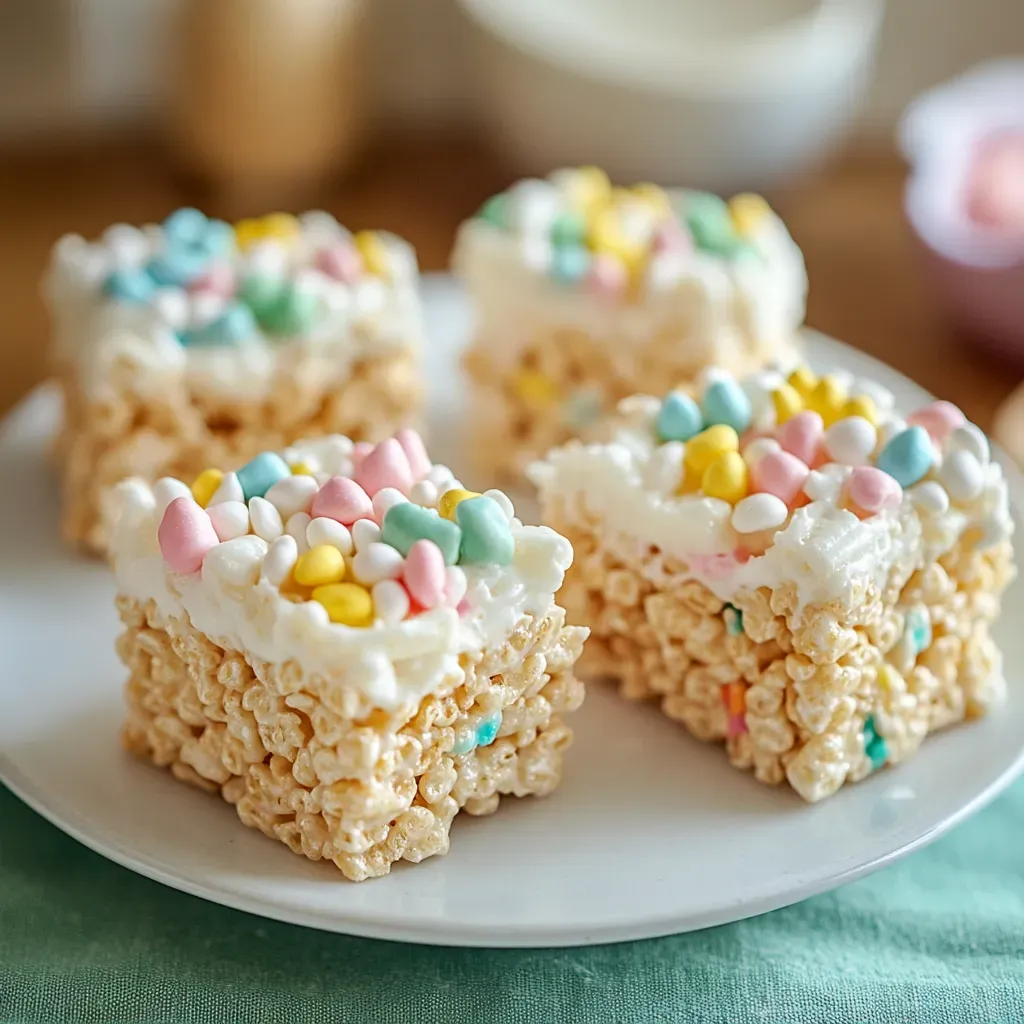
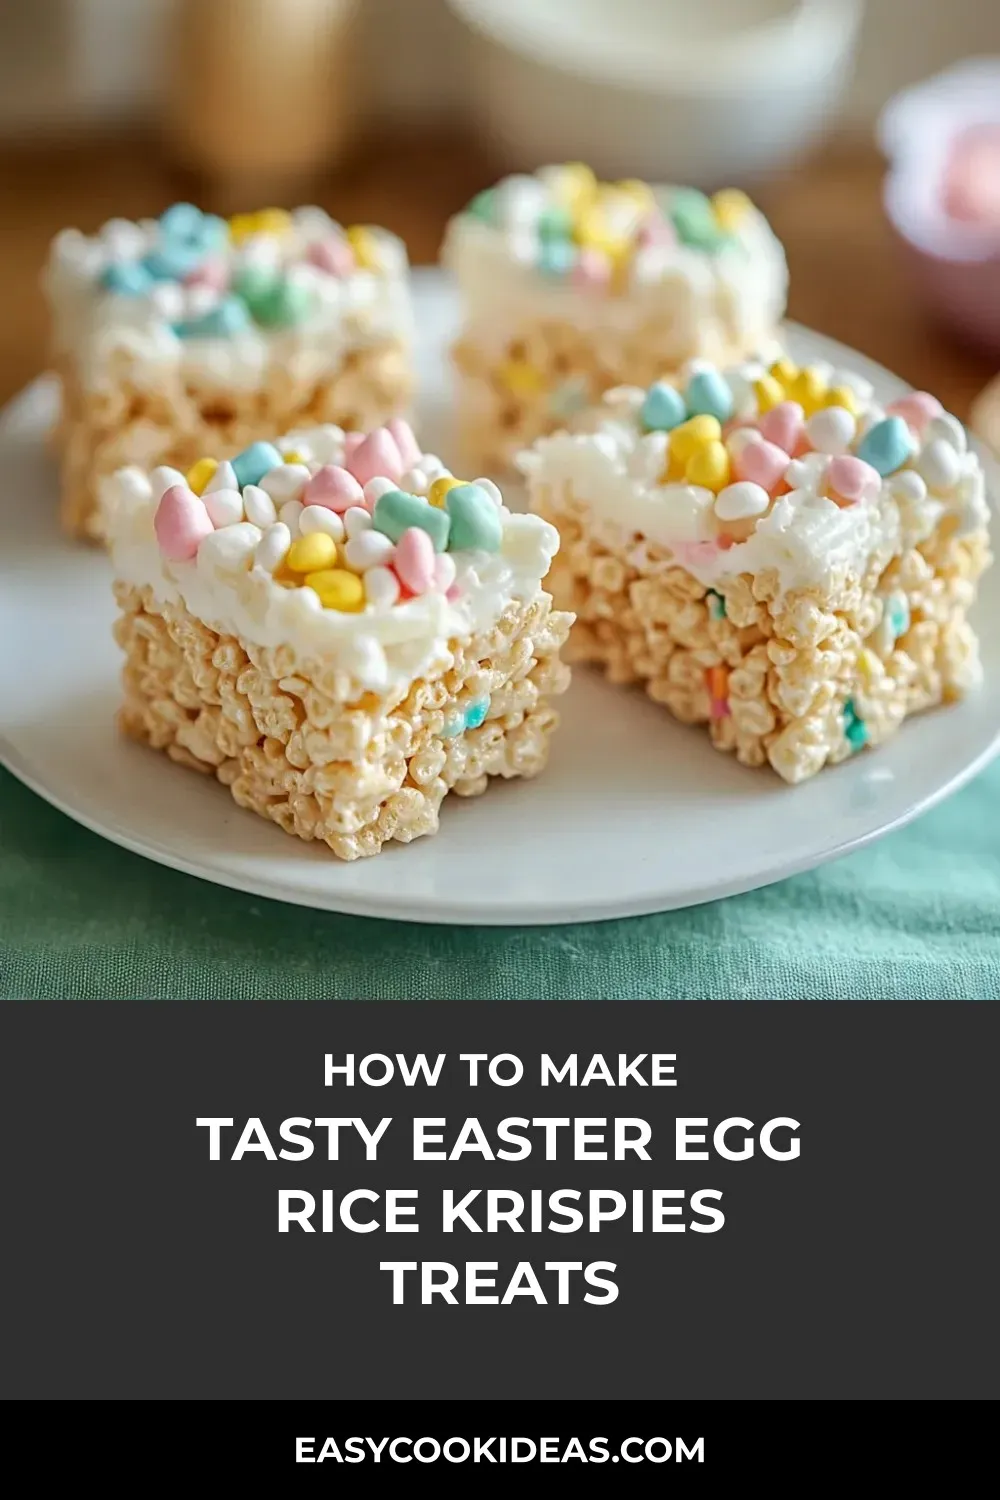
Step into the whimsical world of Easter with these delightful Easter Egg Krispies Nests! This recipe blends the crunch of Rice Krispies, the sweetness of marshmallows, and the colorful cheer of Easter egg candies to create the perfect treat for the holiday season. Crafting these adorable nests is not just a culinary delight but also a joyful activity to share with loved ones, making them an ideal addition to your Easter festivities.
Picture this: a rainy Easter weekend spent indoors, surrounded by laughter and the delightful aroma of marshmallows and Rice Krispies coming together to form these charming nests. My nieces couldn’t get enough of making these treats, and we’ve turned it into an annual tradition ever since. The balance of ingredients in this recipe ensures that your Easter Egg Krispies Nests hold their shape just right, offering a satisfying bite of nostalgia and taste in every mouthful.
Whether you’re hosting an Easter brunch or simply looking for a fun baking project, these Easter Egg Krispies Nests are sure to steal the show. Get creative with different colored frostings and toppings to suit any occasion, from baby showers to birthday parties. So, gather your ingredients, unleash your inner pastry chef, and let’s whip up these delightful nests that promise to bring a touch of magic to your Easter celebration!
Quick Benefits
- Family-friendly Activity: Making these Easter Egg Krispies Nests is a fun and engaging activity for kids and adults alike, perfect for creating lasting memories with loved ones.
- Versatile Decoration: The recipe offers endless customization options for various occasions, from Easter to baby showers and birthdays, allowing you to tailor the treats to match your event theme.
- Make-ahead Convenience: These treats can be prepared in advance, with the option to freeze the Rice Krispie cups for up to 3 weeks before adding frosting and decorations, making them a convenient and time-saving dessert option.
- Rich Homemade Buttercream: While store-bought frosting is an option, the recipe includes a delicious homemade buttercream that adds a rich and flavorful touch to the Easter nests.
Why You’ll Love This Tasty Easter Egg Rice Krispies Treats Recipe
- Delightful Easter-themed Treat: Perfect for Easter celebrations, these Easter Egg Krispies Nests are a fun and festive treat that will bring joy to everyone, especially kids.
- Easy and Fun to Make: A simple yet exciting recipe that is great for involving kids in the kitchen, creating lasting memories during the process.
- Appealing Texture Contrast: The crunchiness of the Rice Krispies combined with the smooth frosting and candy eggs creates a delightful textural experience that will keep you coming back for more.
- Versatile for Any Occasion: While ideal for Easter, these nests can be customized for various events like baby showers, birthdays, or Halloween, making them a versatile treat for any celebration.
- Make-Ahead Option: With the ability to freeze the Rice Krispie cups in advance, you can prepare these nests ahead of time, adding fresh frosting and candy closer to when you plan to serve them.
- Eye-catching Presentation: These nests make for a visually appealing centerpiece at any spring gathering or event, adding a touch of sweetness to the occasion.
- Customizable Frosting: Homemade buttercream frosting provides a richer and tastier option, allowing you to tailor the flavor to your liking and enhance the overall taste of the treat.
- Endless Decorating Possibilities: While Easter egg candies are suggested, you can get creative with various decorations like jelly beans, chocolate eggs, or colorful candies, making each nest unique and personalized.
- Long-lasting Freshness: With proper storage in an airtight container, these nests can stay tasty for up to 3 days, allowing you to enjoy them over time or prepare them in advance for an event.
- No Restrictions on Creativity: Feel free to play around with colors and decorations to match your theme or preferences, letting your imagination run wild with endless possibilities.
Ingredients for Tasty Easter Egg Rice Krispies Treats
- 16 ounces marshmallows, jumbo or mini
- ¼ cup milk
- 2 tablespoons unsalted butter
- Green food coloring
- ½ cup unsalted butter
- Easter egg candies
- 7 cups Rice Krispies
- 3-4 cups powdered sugar
- 1 teaspoon vanilla extract
Pro Tips for Tasty Easter Egg Rice Krispies Treats
Pro Tip 1: Maintaining the balance between marshmallows and Rice Krispies is key to creating stable yet tasty treats. Avoid reducing the marshmallow amount for best results.
Pro Tip 2: To keep your Easter Egg Krispies Nests fresh, store them at room temperature in an airtight container with parchment paper between layers. Avoid refrigerating them to prevent the base from becoming too hard.
Pro Tip 3: Experiment with different frosting colors and candy toppings to customize your nests for various occasions like baby showers, birthdays, or Halloween. The possibilities are endless for creating festive and fun treats!
How to Make Tasty Easter Egg Rice Krispies Treats
Step 1: Prepare cupcake pans
Grease standard cupcake pans generously with cooking spray or butter, ensuring to coat the corners well to prevent sticking.
Step 2: Melt marshmallows and butter
In a microwave-safe bowl, mix marshmallows and 2 tablespoons of unsalted butter. Microwave in 30-second increments, stirring each time, until fully melted and smooth.
Step 3: Combine marshmallow mix with cereal
Immediately mix the melted marshmallow mixture into the Rice Krispies using a buttered spatula for even distribution.
Step 4: Shape into nests
Divide the mixture among the greased cupcake pan cavities, gently pressing into the center of each to form a hollow nest shape. Use greased hands or wax paper to prevent sticking.
Step 5: Set nests
Allow the shaped nests to rest at room temperature for approximately 30 minutes until they are firm.
Step 6: Prepare frosting
In a large mixing bowl, cream ½ cup butter until smooth using a mixer. Gradually add 2 cups powdered sugar, ¼ cup milk, and 1 teaspoon vanilla extract. Beat for 5 minutes until creamy. Mix in the remaining powdered sugar and green food coloring to reach desired color and consistency.
Step 7: Decorate nests
Fill a piping bag with frosting and attach a grass tip. Pipe frosting onto the centers of the cooled nests, starting from the outer edge and moving inward. Place 2-3 Easter egg candies on top.
📌 Pin for later!
Storage Tips
Once you’ve finished making the Easter Egg Krispies Nests, you can store them in an airtight container at room temperature for up to 3 days. If you need to stack the nests, place parchment paper between each layer to prevent sticking. Avoid refrigerating the nests, as this can cause the cereal base to become too hard and the frosting to stiffen.
If you want to prepare the Rice Krispie cups ahead of time, you can freeze them without frosting for up to 3 weeks. Simply allow them to come to room temperature before adding fresh frosting and Easter egg candies. This make-ahead option allows you to have adorable treats ready to go for your Easter celebrations without compromising on taste or texture.
Additionally, you can customize these festive nests for other occasions by changing the frosting color and candy toppings. Whether it’s a baby shower, birthday party, or Halloween gathering, you can adapt the decorations to suit the theme. Consider using blue or pink frosting for baby showers, matching frosting to party colors for birthdays, or creating spooky designs for Halloween. The versatility of these treats makes them a fun and delicious option for various events throughout the year.
Ingredient Substitutions
If you don’t have marshmallows on hand, you can substitute marshmallow fluff for them in this recipe. Use around 2 cups of marshmallow fluff for every 10 ounces of marshmallows called for. This swap will give you a similar texture and sweetness in your Easter Egg Krispies Nests.
If you prefer a dairy-free option, you can replace the unsalted butter with a vegan butter alternative. This will work well in both the Rice Krispie mixture and the frosting. Just ensure the vegan butter you choose is suitable for baking and has a similar fat content to regular butter for the best results in taste and texture.
Serving Suggestions
For a delightful presentation, serve these Easter Egg Krispies Nests on a rustic wooden platter lined with fresh greenery to mimic a spring garden setting. Arrange the nests in a circular pattern, filling each one with a generous amount of colorful Easter egg candies. This setup not only looks charming but also enhances the festive spirit of the occasion, making it a perfect treat for Easter brunch or a spring-themed party.
To add an extra touch of sweetness, drizzle some melted chocolate over the nests before placing the Easter egg candies. This creates a decadent chocolatey layer that complements the crispy texture of the Rice Krispies and adds a rich flavor to the overall treat. Guests will love the contrast of the smooth chocolate against the crunchy cereal, making these Easter Egg Krispies Nests a delightful and visually appealing dessert option for any spring gathering.
FAQs for Tasty Easter Egg Rice Krispies Treats
Can I use store-bought frosting instead of homemade buttercream?
Sure, store-bought frosting works just fine! But homemade buttercream offers a richer and tastier option.
Can I use other types of candies to decorate the nests?
Of course! Jelly beans, chocolate eggs, or mini colorful candies are great alternatives for decorating.
Any tips for shaping the Rice Krispie mixture into nests without it sticking to my hands?
Rub some butter on your hands or cover them with wax paper. This makes pressing the mix into shapes so much easier.
Can I prepare the nests in advance?
Make the nests a day before if needed. Store them sealed tightly, but add frosting and candies right before serving for freshness.
Conclusion
As you prepare to make these delightful Easter Egg Krispies Nests, remember that the joy of creating them is just as sweet as enjoying them. The process of molding the crispy cereal treats into charming nests and topping them with colorful eggs is a delightful experience that will bring smiles to all who partake. Whether you’re crafting these nests with little ones or simply indulging in some nostalgic baking, the magic of Easter Egg Krispies Nests is sure to enchant all who gather around.
These Easter Egg Krispies Nests are not only a delicious treat but also a wonderful way to celebrate the season and create lasting memories with loved ones. So, gather your ingredients, unleash your creativity, and let the Easter spirit inspire you to craft these adorable and tasty treats. Share the joy of Easter Egg Krispies Nests with friends and family, and watch as these whimsical delights become a beloved tradition in your holiday celebrations. Happy baking and happy Easter Egg Krispies Nests-making!
📌 Pin for later!
Tasty Easter Egg Rice Krispies Treats
“Create magical Easter Egg Krispies Nests with colorful eggs nestled in fluffy marshmallow frosting—a delightful treat for springtime celebrations!”
Prep Time10 Minutes
Cook Time2 Minutes
Total Time12 Minutes
CuisineAmerican
Skill LevelEasy
Servings30 Servings (30 nests)
Ingredients
- 16 ounces marshmallows, jumbo or mini
- ¼ cup milk
- 2 tablespoons unsalted butter
- Green food coloring
- ½ cup unsalted butter
- Easter egg candies
- 7 cups Rice Krispies
- 3-4 cups powdered sugar
- 1 teaspoon vanilla extract
Instructions
-
Prepare cupcake pans: Grease standard cupcake pans generously with cooking spray or butter, ensuring to coat the corners well to prevent sticking.
-
Melt marshmallows and butter: In a microwave-safe bowl, mix marshmallows and 2 tablespoons of unsalted butter. Microwave in 30-second increments, stirring each time, until fully melted and smooth.
-
Combine marshmallow mix with cereal: Immediately mix the melted marshmallow mixture into the Rice Krispies using a buttered spatula for even distribution.
-
Shape into nests: Divide the mixture among the greased cupcake pan cavities, gently pressing into the center of each to form a hollow nest shape. Use greased hands or wax paper to prevent sticking.
-
Set nests: Allow the shaped nests to rest at room temperature for approximately 30 minutes until they are firm.
-
Prepare frosting: In a large mixing bowl, cream ½ cup butter until smooth using a mixer. Gradually add 2 cups powdered sugar, ¼ cup milk, and 1 teaspoon vanilla extract. Beat for 5 minutes until creamy. Mix in the remaining powdered sugar and green food coloring to reach desired color and consistency.
-
Decorate nests: Fill a piping bag with frosting and attach a grass tip. Pipe frosting onto the centers of the cooled nests, starting from the outer edge and moving inward. Place 2-3 Easter egg candies on top.