Follow Me On Social Media!
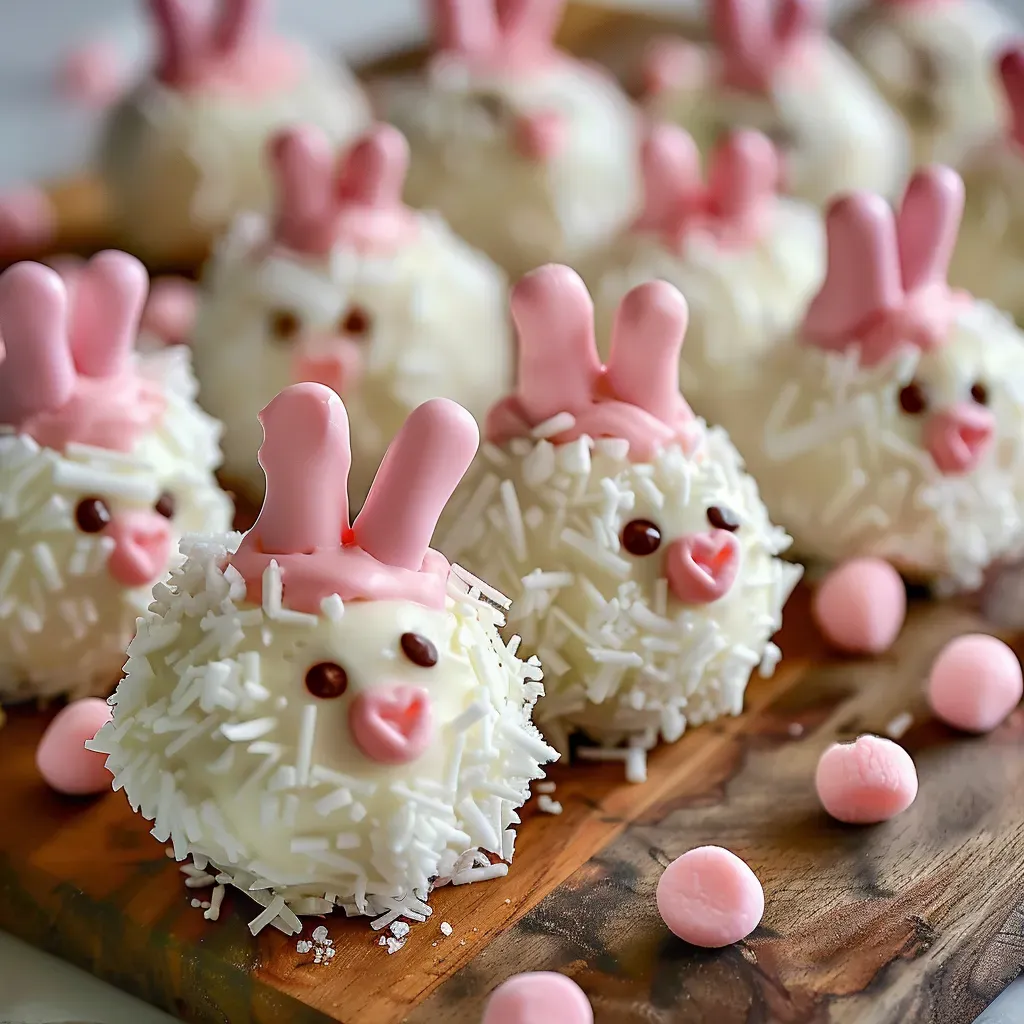
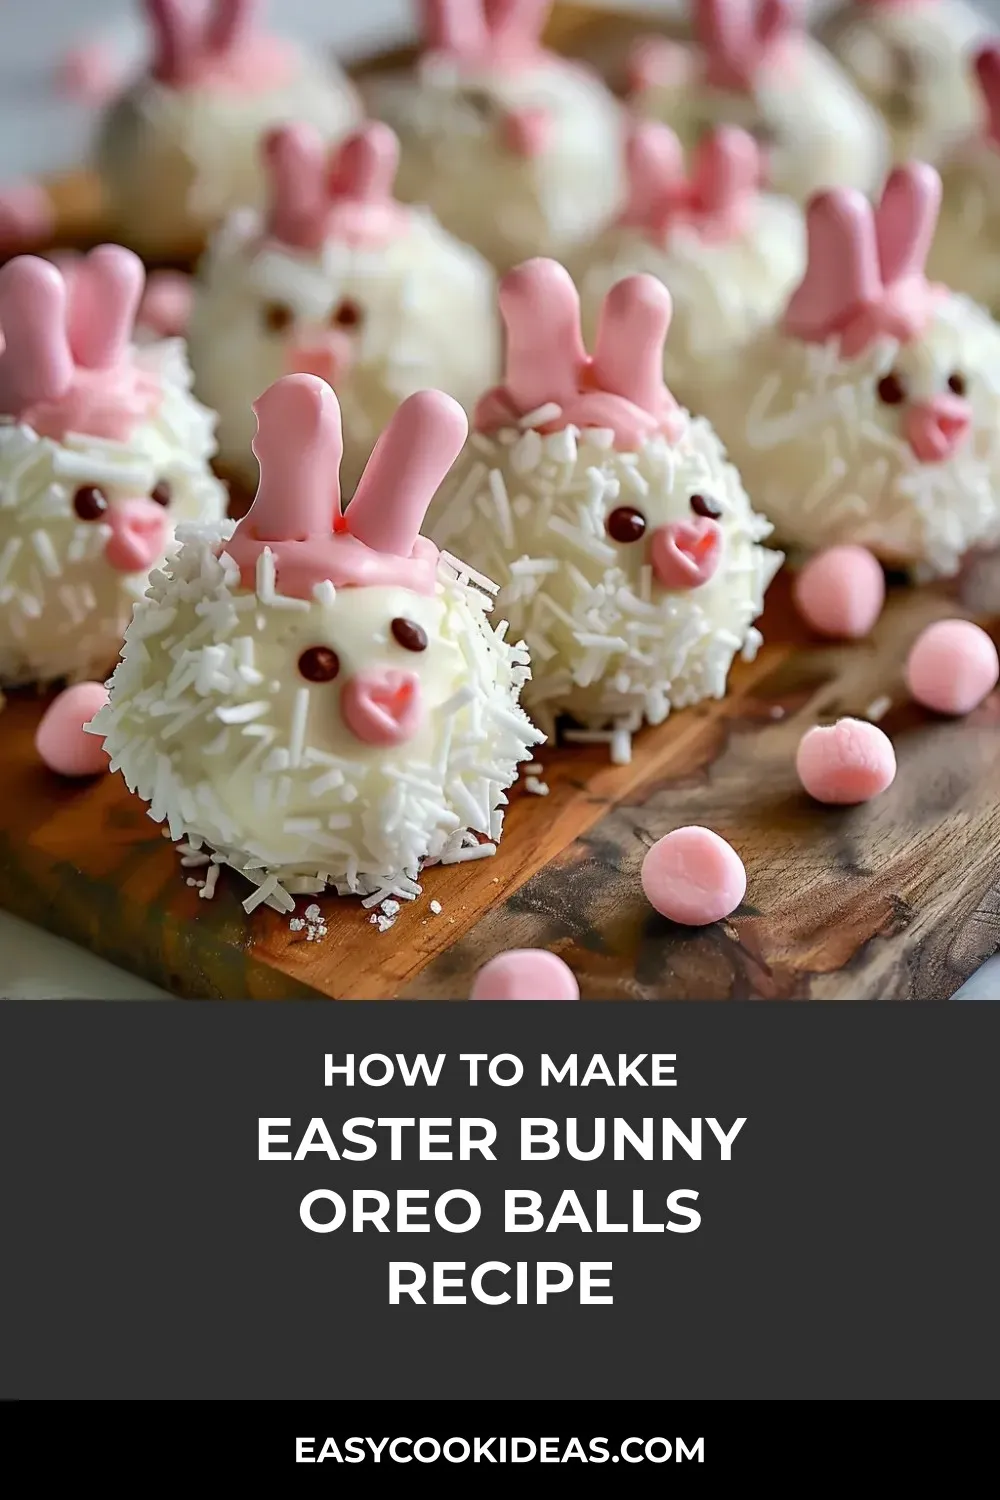
Get ready to add a touch of whimsy to your Easter celebration with these delightful Bunny Butt Oreo Balls! These adorable bite-sized treats are sure to steal the show on your dessert table with their fluffy white chocolate coating, coconut “fur,” and dainty pink feet. As you sink your teeth into these sweet confections, you’ll discover a perfect blend of rich Oreo cookies and creamy cream cheese that make them simply irresistible.
I’ve been delighting my family and friends with these Bunny Butt Oreo Balls for years, and they never fail to bring smiles and laughter to our Easter gatherings. The combination of cuteness and deliciousness in each bite is truly magical. Whether you’re a seasoned baker or a novice in the kitchen, these no-bake treats are a fun and easy way to add a playful touch to your holiday festivities. So, roll up your sleeves and let’s hop into making these adorable Easter treats that are as fun to make as they are to eat!
Quick Benefits
- Whimsical and Adorable Presentation: Bunny Butt Oreo Balls are a show-stopping addition to any Easter dessert table, bringing smiles and giggles to guests of all ages with their playful design.
- Delicious Combination of Flavors: The rich Oreo cookies, creamy cream cheese, and sweet white chocolate create a truffle-like confection that delivers irresistible flavor in every bite.
- Versatile and Creative Adaptations: This recipe allows for fun variations like using Golden Oreos for a “carrot cake” flavor or cookies and cream candy melts for a marbled effect, encouraging creativity in the kitchen.
- Family-Friendly Activity: Bunny Butt Oreo Balls make for a delightful Easter activity for the whole family, fostering togetherness and creating lasting holiday memories while preparing these delectable treats.
Why You’ll Love This Easter Bunny Oreo Balls Recipe Recipe
- Adorable Presentation: These Bunny Butt Oreo Balls are the star attraction of any Easter dessert table with their whimsical design featuring fluffy coconut “fur,” pink feet details, and tiny marshmallow tails, making them too cute to resist.
- Delicious Flavor: The combination of finely crushed Oreo cookies, creamy cream cheese, and sweet white chocolate results in a truffle-like confection with a rich and irresistible taste that everyone will love.
- Versatile Recipe: You can get creative and customize these treats by using Golden Oreos for a “carrot cake” flavor or cookies and cream candy melts for a marbled effect, making them perfect for any Easter celebration.
- Make-Ahead Option: The undecorated Oreo balls can be made in advance and frozen for up to a month, allowing you to prepare them ahead of time and decorate them closer to your Easter festivities.
- Family-Friendly Activity: This recipe is a great activity to share with children of all ages, from rolling the Oreo mixture into balls to decorating with coconut and marshmallow tails, creating a fun and memorable Easter tradition.
- Memorable Easter Treats: These Bunny Butt Oreo Balls bring playfulness and charm to your celebration, creating moments of joy and delight as guests of all ages are sure to be impressed by their whimsical appearance and delicious taste.
Ingredients for Easter Bunny Oreo Balls Recipe
For the Oreo Balls
- 8 oz cream cheese, softened
- 1 (14 oz) package Oreo cookies, finely crushed
For the Coating & Decorations
- ½ cup shredded coconut (for a fluffy tail effect, optional)
- 12 oz white chocolate or white candy melts, melted
- Pink candy melts or pink sprinkles (for bunny feet details)
- Mini marshmallows or candy pearls (for the bunny tail)
- Small white chocolate chips (for foot decoration, optional)
Pro Tips for Easter Bunny Oreo Balls Recipe
For the best texture, make sure to finely crush the Oreo cookies to achieve a smooth truffle-like consistency in the mixture. A food processor works perfectly for this step, but if you don’t have one, you can crush the cookies in a sealed plastic bag using a rolling pin. The key is to crush them finely to ensure the Oreo balls hold together well and have a creamy texture.
Proper chilling is essential to prevent the Oreo balls from falling apart when dipped in the warm white chocolate. Be patient and allow enough time for the balls to firm up in the refrigerator before dipping them. This step ensures that the chocolate coating adheres smoothly to the chilled balls, resulting in perfectly coated Bunny Butt Oreo Balls that are both adorable and delicious.
Get creative with variations to make these Bunny Butt Oreo Balls even more exciting. Experiment with different flavors by using Golden Oreos for a hint of cinnamon or adding citrus zest to the Oreo mixture for a refreshing twist. Additionally, try using cookies and cream candy melts for a marbled effect or decorating with unique elements like fondant details to make each bunny butt truly unique and memorable for your Easter celebration.
How to Make Easter Bunny Oreo Balls Recipe
Step 1: Make the Oreo truffle mixture
In a food processor, pulse Oreos (with filling) until fine crumbs form. Add softened cream cheese and mix until a thick, sticky dough forms.
Step 2: Shape the Oreo balls
Form 1 tablespoon of the mixture into balls by rolling between your palms. Place on a parchment-lined baking sheet and chill in the freezer for 15-20 minutes before dipping.
Step 3: Melt the white chocolate
In a microwave-safe bowl, melt white chocolate or candy melts in 30-second intervals, stirring until smooth. If too thick, add 1 teaspoon coconut oil or vegetable shortening to achieve dipping consistency.
Step 4: Coat the Oreo balls
Dip each chilled Oreo ball into melted white chocolate using a fork or dipping tool. Tap off excess chocolate, place back on parchment-lined sheet, and sprinkle with shredded coconut while chocolate is still wet if desired.
Step 5: Attach the bunny tail & feet
– Attach a mini marshmallow or candy pearl to each Oreo ball as a bunny tail.
– Create bunny feet by piping small ovals with melted pink candy melts on parchment paper. Let them set, then attach two feet to each Oreo ball with melted white chocolate. Add small white chocolate chips for toe pads.
Step 6: Let the Oreo balls set
Let the decorated Oreo balls sit at room temperature for 15 minutes or refrigerate for 10 minutes until fully set before serving.
📌 Pin for later!
Storage Tips
Once you have prepared and decorated your Bunny Butt Oreo Balls, it’s essential to store them properly to maintain their freshness and appearance. These delightful treats can be stored in the refrigerator for up to a week. Place the finished Bunny Butt Oreo Balls in a single layer in an airtight container to prevent them from absorbing any other odors in the fridge. This method helps preserve the white chocolate coating and ensures that the Oreo balls remain firm and delicious.
For the best taste and texture when serving your Bunny Butt Oreo Balls, allow them to come to room temperature for about 15 minutes before enjoying. This short time outside the refrigerator helps soften the interior to the perfect creamy consistency, enhancing the overall eating experience. By following these storage and serving tips, you can ensure that your Bunny Butt Oreo Balls retain their whimsical charm and scrumptious flavor throughout the Easter festivities.
Ingredient Substitutions
If you need to make a substitution for the white chocolate or white candy melts, you can use vanilla-flavored almond bark as a suitable replacement. It melts smoothly and offers a similar white coating for the Oreo balls. Another alternative is white chocolate chips, which can be melted with a small amount of vegetable oil for a creamy texture ideal for dipping the Oreo balls.
For those who may not enjoy coconut or wish to avoid it due to allergies, you can omit the shredded coconut used for the bunny tail effect. Instead, consider rolling the coated Oreo balls in white sprinkles or finely crushed Oreo crumbs for a different decorative touch. This adjustment allows you to personalize the appearance of the Bunny Butt Oreo Balls while still maintaining their delightful Easter charm.
Serving Suggestions
To elevate the presentation of your Bunny Butt Oreo Balls, consider displaying them on a bed of edible grass made from shredded green coconut tinted with a few drops of green food coloring. This not only adds a pop of color to your dessert table but also enhances the whimsical Easter theme of the treats. Additionally, you can create a cute scene by arranging the Oreo balls in a semi-circle to mimic a bunny’s tail with mini marshmallows or candy pearls placed strategically to resemble fluffy cottontails.
For a fun interactive dessert experience, set up a DIY Bunny Butt Oreo Ball decorating station at your Easter gathering. Provide an assortment of toppings such as pastel sprinkles, edible glitter, and mini candy flowers for guests to customize their Oreo balls. Encourage creativity by offering icing pens for guests to add personalized designs or faces to their bunny bottoms. This hands-on activity adds a festive and engaging element to your celebration, allowing everyone to put their own spin on these adorable treats before indulging in their deliciousness.
FAQs for Easter Bunny Oreo Balls Recipe
Can I make Bunny Butt Oreo Balls in advance?
Yes, you can make the undecorated Oreo balls up to a month ahead and freeze them in an airtight container. Thaw them in the refrigerator overnight before dipping and decorating when you’re ready. The fully completed treats can be stored in the refrigerator for up to a week in an airtight container.
What should I do if my Oreo balls are falling apart while dipping in chocolate?
Ensure that the Oreo balls are properly chilled before dipping to prevent them from falling apart in warm chocolate. Proper chilling helps them maintain their shape and texture during the dipping process.
Can I customize the Bunny Butt Oreo Balls recipe?
Absolutely! You can customize the recipe by trying different variations such as using Golden Oreos with added cinnamon for a “carrot cake” flavor, cookies and cream candy melts for a marbled effect, or adding citrus zest to the Oreo mixture for a hint of citrus flavor. Get creative with your adaptations!
How can I involve children in making Bunny Butt Oreo Balls?
Children of varying ages can participate in making these treats. Younger children can help roll the Oreo mixture into balls, older children can assist with decorations like coconut and marshmallow tails, and teenagers can handle the chocolate dipping process with some guidance. Make it a fun family activity by creating an assembly line with different tasks for everyone!
Conclusion
As you prepare to create your own Bunny Butt Oreo Balls this Easter, remember to have fun and let your creativity shine. These adorable treats are not only delicious but also a delightful way to bring smiles to your loved ones’ faces. Whether you follow the classic recipe or add your own unique twists, the joy of crafting these whimsical bunny bottoms will surely make your holiday celebration extra special.
So, gather your ingredients, enlist the help of your family members, and embark on a culinary adventure that combines delicious flavors with playful charm. From the first bite into the creamy, chocolatey center to the moment your guests admire your artfully decorated bunny butts, these Oreo balls are bound to become a cherished Easter tradition in your home. Wishing you a hoppy and delightful Easter filled with love, laughter, and, of course, Bunny Butt Oreo Balls!
📌 Pin for later!
Easter Bunny Oreo Balls Recipe
“Bunny Butt Oreo Balls: A whimsical Easter delight with fluffy coconut tails and pink feet, these adorable Oreo truffles are as charming as they are delicious!”
Prep Time30 Minutes
Cook Time~ undefined
Total Time30 Minutes
CuisineAmerican
Skill LevelEasy
Servings24 Servings (24 bunny butt Oreo balls)
Ingredients
For the Oreo Balls
- 8 oz cream cheese, softened
- 1 (14 oz) package Oreo cookies, finely crushed
For the Coating & Decorations
- ½ cup shredded coconut (for a fluffy tail effect, optional)
- 12 oz white chocolate or white candy melts, melted
- Pink candy melts or pink sprinkles (for bunny feet details)
- Mini marshmallows or candy pearls (for the bunny tail)
- Small white chocolate chips (for foot decoration, optional)
Instructions
-
Make the Oreo truffle mixture: In a food processor, pulse Oreos (with filling) until fine crumbs form. Add softened cream cheese and mix until a thick, sticky dough forms.
-
Shape the Oreo balls: Form 1 tablespoon of the mixture into balls by rolling between your palms. Place on a parchment-lined baking sheet and chill in the freezer for 15-20 minutes before dipping.
-
Melt the white chocolate: In a microwave-safe bowl, melt white chocolate or candy melts in 30-second intervals, stirring until smooth. If too thick, add 1 teaspoon coconut oil or vegetable shortening to achieve dipping consistency.
-
Coat the Oreo balls: Dip each chilled Oreo ball into melted white chocolate using a fork or dipping tool. Tap off excess chocolate, place back on parchment-lined sheet, and sprinkle with shredded coconut while chocolate is still wet if desired.
-
Attach the bunny tail & feet: – Attach a mini marshmallow or candy pearl to each Oreo ball as a bunny tail.
– Create bunny feet by piping small ovals with melted pink candy melts on parchment paper. Let them set, then attach two feet to each Oreo ball with melted white chocolate. Add small white chocolate chips for toe pads. -
Let the Oreo balls set: Let the decorated Oreo balls sit at room temperature for 15 minutes or refrigerate for 10 minutes until fully set before serving.