Follow Me On Social Media!

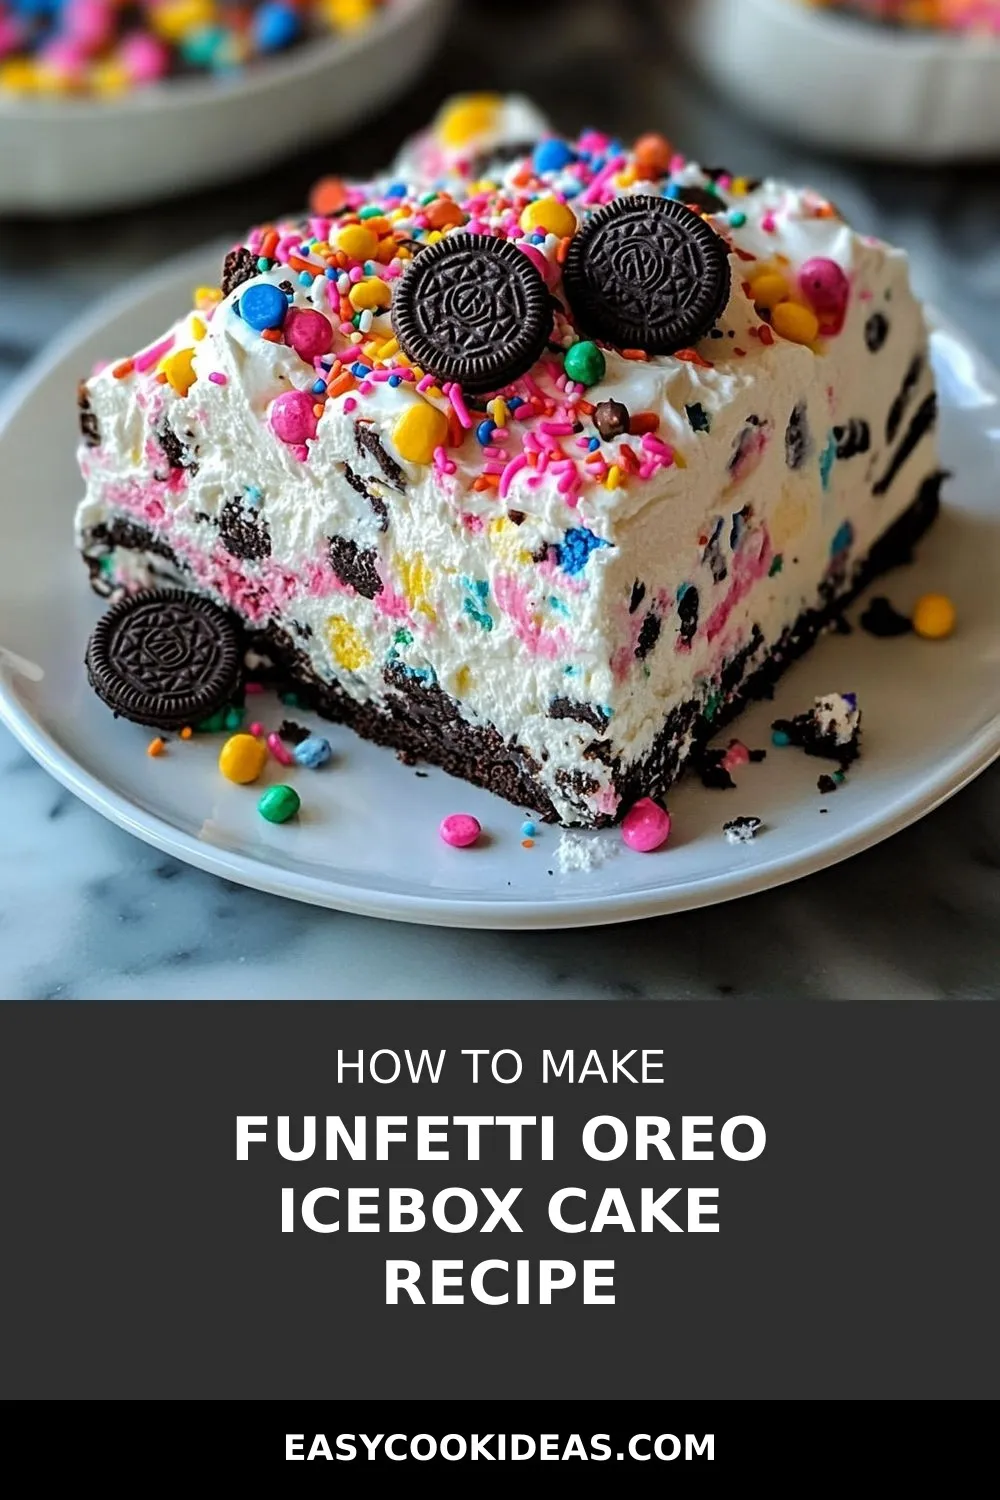
Are you ready to whip up a delightful treat that will have everyone gathering around the kitchen? Look no further than this scrumptious No-Bake Funfetti Oreo Icebox Cake! This retro-inspired dessert combines the classic flavors of Oreo cookies with a creamy, sweet mixture and a generous sprinkle of rainbow happiness. It’s a breeze to make and disappears in no time, making it a perfect go-to recipe for any occasion.
I first created this No-Bake Funfetti Oreo Icebox Cake for a special birthday sleepover, and it was an instant hit with both kids and adults alike. The colorful sprinkles and the playful layers of crunchy cookies and creamy filling bring joy to the table with every slice. Whether you’re celebrating a birthday, hosting a gathering, or simply craving a delightful dessert, this icebox cake is sure to bring smiles and happy memories to your kitchen.
With its vibrant colors and delightful flavors, this No-Bake Funfetti Oreo Icebox Cake is a surefire way to add a touch of fun to any event. Plus, you can easily customize it by using different flavored Oreos or seasonal sprinkles to suit the occasion. So, gather your ingredients, layer them with love, chill to perfection, and get ready to enjoy a slice of pure happiness with this delightful no-bake dessert!
Quick Benefits
- Easy no-bake dessert perfect for quick preparation
- Versatile – can be customized with different types of Oreos and sprinkles
- Stores well in the refrigerator for up to three days
- Optional mini chocolate chips add extra texture and flavor
Why You’ll Love This Funfetti Oreo Icebox Cake Recipe Recipe
- Easy Crowd-Pleaser: This recipe is effortless to make and perfect for gatherings or family events.
- Nostalgic and Playful: Reminiscent of childhood birthday parties, the colorful sprinkles bring instant joy to both kids and adults.
- Versatile: Customize the cake by using different flavored Oreos or adding various sprinkles for holidays or special occasions.
- Make-Ahead: Prepare the cake in advance and chill for at least 4 hours, making it a convenient dessert option.
- Moist and Flavorful: The Oreo cookies, along with the cream cheese and whipped cream mixture, create a moist and delicious layered dessert.
- Optional Chocolate Chips: The addition of mini chocolate chips adds a delightful texture, but they can be omitted for a different twist.
- Long-Lasting Freshness: Store leftovers in the refrigerator for up to 3 days, ensuring you can enjoy this treat over time.
- Celebratory Presentation: Serve with fresh berries, candles, or additional decorations for a festive and fun birthday-style dessert.
- Historical Charm: Icebox cakes have a rich history and evoke a sense of nostalgia, making this modern version a delightful throwback.
Ingredients for Funfetti Oreo Icebox Cake Recipe
Base
- 1 package (405 g) Oreo cookies
Cream Layer
- 225 g cream cheese, softened
- 120 g powdered sugar
- 240 ml heavy cream
- 1 teaspoon vanilla extract
Mix-ins
- 90 g mini chocolate chips (optional)
- 60 g rainbow sprinkles
Pro Tips for Funfetti Oreo Icebox Cake Recipe
For the perfect texture and flavor, allow the icebox cake to chill for at least 4 hours or, ideally, overnight. This ensures the layers set properly and makes slicing a breeze.
Feel free to get creative with the recipe by using different Oreo flavors like golden or flavored varieties for a unique twist on the classic funfetti icebox cake.
To keep the dessert fresh, store any leftovers covered in the refrigerator for up to 3 days. This will prevent the cookies from becoming too soggy and maintain the cake’s deliciousness.
How to Make Funfetti Oreo Icebox Cake Recipe
Step 1: Whip the Cream
Using a large mixing bowl, whisk together the heavy cream and powdered sugar until stiff peaks form.
Step 2: Prepare Cream Cheese Base
In a different bowl, mix the softened cream cheese until smooth. Add and mix in the vanilla extract.
Step 3: Combine Whipped Cream and Cream Cheese
Gently fold the whipped cream mixture into the cream cheese base until evenly combined.
Step 4: Add Sprinkles and Chocolate Chips
Gently mix in rainbow sprinkles and mini chocolate chips until evenly combined.
Step 5: Assemble Base Layer
Place a single, even layer of Oreo cookies on the bottom of a 23×33 cm baking dish.
Step 6: Spread Cream Mixture
Spread a layer of the cream mixture evenly over the cookies, ensuring they are completely covered.
Step 7: Repeat Layers
Layer Oreo cookies and cream mixture alternately, ending with a final layer of cream on top.
Step 8: Chill Cake
Chill uncovered for at least 4 hours or overnight to let flavors blend and layers firm up.
Step 9: Garnish and Serve
If desired, garnish with additional rainbow sprinkles and crushed Oreo cookies before serving.
📌 Pin for later!
Storage Tips
Once the No-Bake Funfetti Oreo Icebox Cake is prepared, any leftovers should be stored in the refrigerator to maintain its freshness. Cover the dessert with plastic wrap or place it in an airtight container before storing it in the fridge. This will prevent the cake from drying out and help it stay moist and delicious for up to three days.
To ensure the best texture and flavor, it is recommended to consume the icebox cake within three days of making it. After this time, the cookies may become too soggy. If wanting to enjoy the dessert for longer, consider making it closer to the time you plan to serve it. The cake can be a delightful treat for family events, birthday celebrations, or any occasion that calls for a colorful and festive dessert.
Experiment with different variations of the recipe by substituting Oreos with golden or flavored varieties, and feel free to personalize the cake by using different types of sprinkles or mix-ins. Serve the funfetti Oreo icebox cake with fresh berries for a refreshing touch, or add candles for a birthday-style presentation. Enjoy the playful and nostalgic flavors of this chilled dessert that is sure to bring smiles to everyone who tries it.
Ingredient Substitutions
If you prefer a lighter taste, you can substitute the heavy cream with whipped topping like Cool Whip. This will give a slightly different texture but will still provide a creamy element to the dessert.
For a vegan version of this icebox cake, you can swap the cream cheese with a dairy-free cream cheese alternative and use a plant-based whipped topping in place of heavy cream. This will make the dessert suitable for those with dietary restrictions.
If you don’t have rainbow sprinkles on hand, you can use other types of sprinkles or decorations to customize the cake for different occasions. Consider using themed sprinkles for holidays or events to add a festive touch to the dessert.
Serving Suggestions
For a fun and festive presentation, serve slices of the No-Bake Funfetti Oreo Icebox Cake with a dollop of whipped cream on top and a sprinkle of extra rainbow sprinkles. The colorful and playful look will add to the joy this dessert brings to any gathering, whether it’s a birthday party or a family get-together.
To elevate the birthday celebration vibes, consider adding a sparkler or colorful candle on each slice before serving. This extra touch will not only make the dessert visually appealing but also create a magical moment as the candles are lit. It’s a simple yet effective way to make this icebox cake the highlight of any special occasion!
FAQs for Funfetti Oreo Icebox Cake Recipe
Can I use a different type of Oreo cookie for this recipe?
Yes, you can substitute Oreos with golden or flavored varieties to customize the taste.
How long should I chill the No-Bake Funfetti Oreo Icebox Cake?
Chill the layered dessert for at least 4 hours or overnight for best results and easy slicing.
Should I remove the cream filling from the Oreos before using them in the recipe?
No, use the whole Oreo cookie, including filling, to add moisture and flavor to the layers.
Are the mini chocolate chips mandatory in this recipe?
Absolutely. The chocolate chips are optional and can be left out or replaced with other mix-ins.
Conclusion
Congratulations on creating your very own No-Bake Funfetti Oreo Icebox masterpiece! This delightful dessert not only brings back nostalgic feelings of childhood but also promises to put a smile on everyone’s face. The combination of crunchy Oreo cookies, creamy filling, and colorful sprinkles is a surefire way to create a happy and memorable treat for any occasion.
Whether you’re making this cake for a birthday celebration, a family gathering, or simply to satisfy your sweet tooth, the No-Bake Funfetti Oreo Icebox is a versatile and crowd-pleasing dessert. Feel free to customize it with different types of Oreos, sprinkles, or even seasonal variations to suit your preferences and the occasion.
Remember to chill the cake thoroughly before serving to ensure that each slice holds together perfectly. And don’t forget to savor every colorful and delicious bite of this delightful No-Bake Funfetti Oreo Icebox creation. Enjoy the process of making this easy and fun dessert, and bask in the joy it brings to all who indulge in it.
📌 Pin for later!
Funfetti Oreo Icebox Cake Recipe
“Whip up this no-bake Funfetti Oreo Icebox Cake – a colorful, crowd-pleasing treat that’s a nostalgic nod to childhood celebrations.”
Prep Time25 Minutes
Cook Time~ undefined
Total Time25 Minutes
CuisineAmerican
Skill LevelEasy
Servings12 Servings (1 large cake)
Ingredients
Base
- 1 package (405 g) Oreo cookies
Cream Layer
- 225 g cream cheese, softened
- 120 g powdered sugar
- 240 ml heavy cream
- 1 teaspoon vanilla extract
Mix-ins
- 90 g mini chocolate chips (optional)
- 60 g rainbow sprinkles
Instructions
-
Whip the Cream: Using a large mixing bowl, whisk together the heavy cream and powdered sugar until stiff peaks form.
-
Prepare Cream Cheese Base: In a different bowl, mix the softened cream cheese until smooth. Add and mix in the vanilla extract.
-
Combine Whipped Cream and Cream Cheese: Gently fold the whipped cream mixture into the cream cheese base until evenly combined.
-
Add Sprinkles and Chocolate Chips: Gently mix in rainbow sprinkles and mini chocolate chips until evenly combined.
-
Assemble Base Layer: Place a single, even layer of Oreo cookies on the bottom of a 23×33 cm baking dish.
-
Spread Cream Mixture: Spread a layer of the cream mixture evenly over the cookies, ensuring they are completely covered.
-
Repeat Layers: Layer Oreo cookies and cream mixture alternately, ending with a final layer of cream on top.
-
Chill Cake: Chill uncovered for at least 4 hours or overnight to let flavors blend and layers firm up.
-
Garnish and Serve: If desired, garnish with additional rainbow sprinkles and crushed Oreo cookies before serving.