Follow Me On Social Media!
Are you ready to embark on a flavorful journey into the world of sourdough baking with our Simple Sourdough Starter Guide? There’s something truly special about cultivating your own sourdough starter from scratch, harnessing the power of wild yeast and wholesome ingredients to craft mouthwatering homemade bread. This guide will walk you through the simple yet magical process, where patience and quality flour come together to create a foundation for endless loaves of deliciousness.
As you dive into creating your sourdough starter, you’ll witness firsthand the transformation of a humble mixture into a lively and fragrant jar of bubbling goodness. The earthy aroma of whole grain flour infusing your starter will evoke memories of baking with loved ones, bridging the gap between generations through the timeless tradition of sourdough. With each feeding and nurturing of your starter, you’re not just baking bread – you’re participating in a culinary legacy that spans centuries, connecting you to the rich heritage of home baking.
From tangy sourdough loaves to fluffy pancakes and crispy pizza crusts, the versatility of a mature sourdough starter knows no bounds. Whether you’re a seasoned baker or a curious beginner, this guide will empower you to unlock the full potential of your starter, infusing your creations with unmatched flavor and tradition. So, roll up your sleeves, gather your ingredients, and get ready to embark on a delicious journey with our Simple Sourdough Starter Guide – where every loaf tells a story of patience, passion, and the art of sourdough baking.
Quick Benefits
- Whole grain flours provide extra nutrients and wild yeasts that jumpstart fermentation, helping the mixture develop bubbles more rapidly.
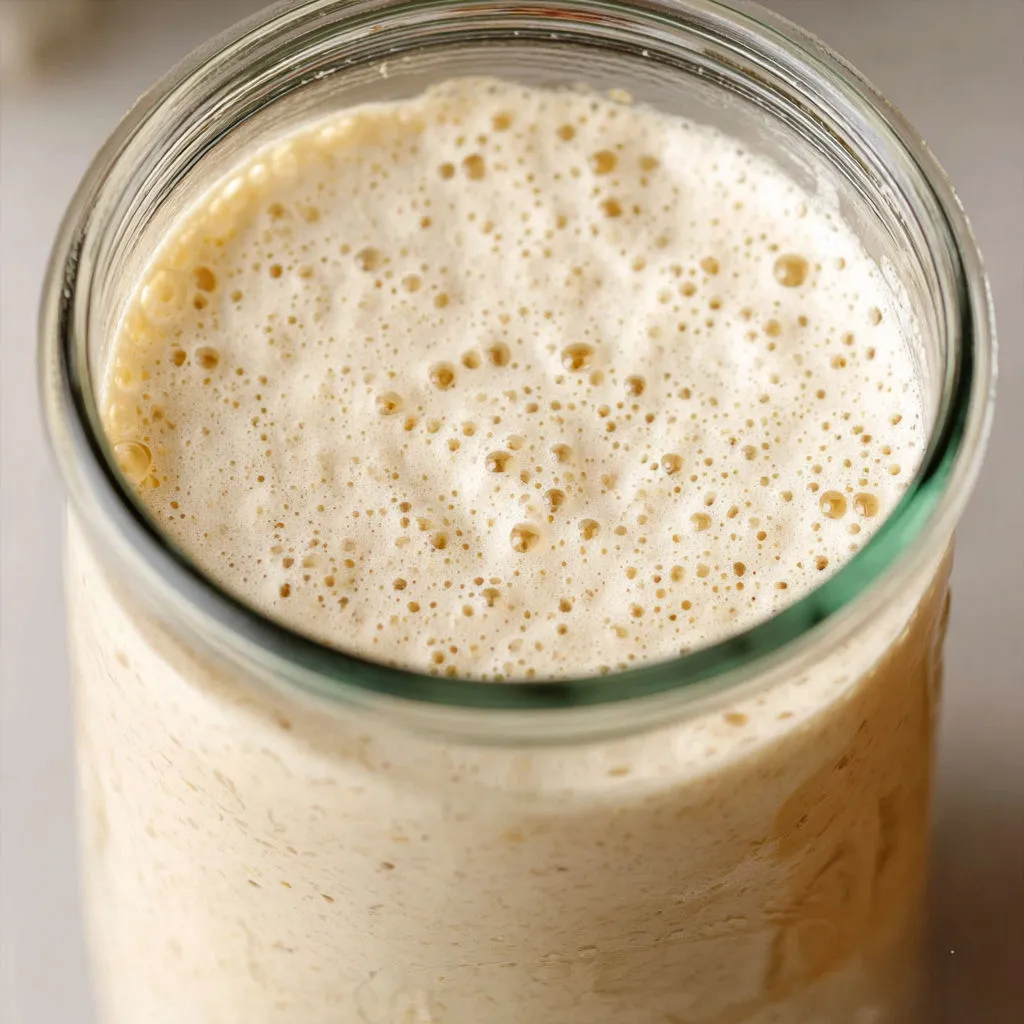
- A healthy starter will develop a pleasantly sour, slightly fruity aroma as the beneficial microbes thrive.
- When the mixture doubles in volume and a spoonful floats in water, it’s typically active and ready for baking projects.
- Refrigerate and feed weekly for infrequent baking, allowing it to come to room temperature before feeding for best results.
Why You’ll Love This Ultimate Sourdough Starter Recipe: Easy & Foolproof Recipe
- Authentic Homemade Bread: Create your own sourdough starter from scratch, capturing wild yeast and setting the foundation for delicious homemade bread, providing an authentic and rewarding baking experience.
- Nostalgic Aromas: Enjoy the earthy aroma of baking with whole grain flour, reminiscent of traditional bread-making methods, connecting you to generations before and creating a nostalgic atmosphere in your kitchen.
- Versatile Usage: Beyond bread, use your mature starter in various recipes like pancakes, muffins, English muffins, pizza crust, and waffles for a unique texture and a subtle sourdough flavor, expanding your culinary repertoire.
- Roots in Tradition: Embrace the rich tradition of home baking and connect with the history of bread-making, dating back thousands of years, as you continue the legacy of using wild yeast to leaven your baked goods.
- Nutrient Boost: Jumpstart fermentation with whole grain flours, providing extra nutrients and wild yeasts that facilitate rapid bubble development, ensuring a healthy and robust sourdough starter for all your baking endeavors.
- Aromatic Indicators: Enjoy the pleasant, tangy aroma and fruity notes of a thriving starter, indicating the presence of beneficial microbes that enhance the flavor profile of your sourdough creations.
- Active Starter Signals: Monitor the volume doubling and float test to determine when your starter is active and ready for baking, ensuring successful and flavorful bread-making projects.
- Convenience and Longevity: Refrigerate your starter for infrequent baking, feeding it weekly and allowing it to come to room temperature before use, ensuring its vitality and longevity for years of flavorful baking experiences.
Ingredients for Ultimate Sourdough Starter Recipe: Easy & Foolproof
For the sourdough starter
- 1 litre filtered or spring water, at room temperature
- 100 g whole grain rye flour or whole wheat flour, preferably organic
- 500 g all-purpose flour, unbleached and preferably organic, for feedings
Pro Tips for Ultimate Sourdough Starter Recipe: Easy & Foolproof
Pro Tip 1: Starting your sourdough with whole grain flour can give it a robust kickstart, enhancing the earthy aroma and flavor. It’s a great way to build a strong foundation for your sourdough starter.
Pro Tip 2: To maintain a healthy and active sourdough starter, consistency is key. Regular feeding and monitoring of its growth are crucial for optimal results in your baking projects.
Pro Tip 3: Don’t hesitate to experiment with different recipes using your sourdough starter. From bread to waffles, the possibilities are endless. Embrace the tradition and flavor that sourdough brings to your homemade creations.
How to Make Ultimate Sourdough Starter Recipe: Easy & Foolproof
Step 1: Prepare the Starter Jar
Weigh the clean, empty glass jar in grams and label it with the current date for tracking purposes.
Step 2: Day 1 – Combine Initial Ingredients
Combine 100 g whole wheat or rye flour and 100 g water in a jar. Mix well with a fork until thick and homogeneous. Scrape down the sides, cover loosely, and secure a rubber band around the jar to mark the starter’s height. Let it sit at room temperature for 24 hours.
Step 3: Day 2 – Observation
Check the starter for minimal activity and small bubbles. Cover and let it sit at room temperature for an additional 24 hours.
Step 4: Day 3 – First Feeding
Discard half of the mixture, keeping 100 g of starter. Add 100 g all-purpose flour and 100 g room temperature water. Mix well, scrape sides, cover loosely, and allow to rest at room temperature for 24 hours.
Step 5: Day 4 – Continued Growth
Remove all but 100 g of starter. Add 100 g all-purpose flour and 100 g room temperature water. Stir, scrape down sides, cover loosely, and let rest at room temperature for 24 hours. Repeat feeding if growth slows.
Step 6: Day 5 – Bubbles and Rise
Leave 100 g of starter in the container. Add 100 g all-purpose flour and 100 g water, stir well, scrape down the sides, loosely cover, and let it rest for 24 hours.
Step 7: Day 6 and 7 – Active Starter Development
Every day, discard all but 100 g of starter. Feed with 100 g all-purpose flour and 100 g water, mix well, scrape the sides, loosely cover, and allow to double in size.
Step 8: Assess Starter Readiness
To test if the starter is ready, drop a spoonful into a bowl of water. If it floats, it is ready to use. If it sinks, continue discarding and feeding daily until it shows appropriate activity.
Step 9: Ongoing Maintenance
For regular bakers, feed the starter daily at room temperature, discarding as needed, and allow it to peak for 4–6 hours before using. For occasional bakers, refresh the starter weekly by discarding, feeding, resting at room temperature for 1–2 hours, and then refrigerating again.
📌 Pin for later!
Storage Tips
Once you have successfully created and nurtured your sourdough starter, it is important to store it properly to maintain its health and activity. If you plan to bake regularly, you can keep your starter at room temperature, feeding it daily to keep it active. However, if you do not plan to bake as often, you can store your starter in the refrigerator. Remember to always feed your starter before refrigerating it, and aim to feed it at least once a week to keep it thriving. If you see a dark liquid on top after storage, simply pour it off, feed your starter, and it will be ready to use again.
To store your sourdough starter in the refrigerator, transfer it to a clean container with a lid and place it in the fridge. Before using it again, allow it to come to room temperature and feed it to revive its activity. Remember that variations in temperature or flour may require some adjustment in the feeding routine, so observe your starter’s behavior and adjust as needed. With proper care and regular feedings, your sourdough starter can last for years, providing you with delicious bread and baked goods infused with its unique tangy flavor and rich tradition.
Ingredient Substitutions
If you don’t have whole grain rye or wheat flour for the initial sourdough starter, using all-purpose flour is a suitable substitute. While the fermentation process may be slightly slower, it will still yield a successful starter. Just be mindful that the flavor profile may vary slightly compared to using whole grain flour.
While filtered or spring water is recommended for optimal results, cool boiled tap water can be used as a substitute if needed. The key is to ensure the water is at room temperature to help maintain a consistent environment for the fermentation process. Using fresh flour is crucial for reliable fermentation, so make sure your flour is not expired or stale before starting your sourdough starter.
Remember that maintaining a regular feeding routine is important for a healthy and active sourdough starter. If you plan to bake infrequently, storing your starter in the refrigerator and feeding it weekly is a good practice. Just allow it to come to room temperature before feeding to ensure it is active and ready for your baking projects.
Serving Suggestions
To showcase the tangy flavor and rich tradition of your homemade sourdough starter, consider serving freshly baked sourdough loaves with a spread of flavored butters or artisanal jams. The robust flavor of the sourdough pairs beautifully with sweet and savory toppings, enhancing the overall dining experience. For a more interactive presentation, create a DIY toast bar with an assortment of toppings like avocado slices, smoked salmon, heirloom tomatoes, and microgreens, allowing guests to customize their sourdough toast creations.
For a unique twist on a classic dish, incorporate your sourdough starter into a fluffy waffle batter for a delightful breakfast or brunch option. The subtle sourdough note adds depth of flavor and a hint of tanginess to the waffles, creating a memorable culinary experience. Serve the sourdough waffles with an array of toppings such as fresh berries, whipped cream, maple syrup, or a dusting of powdered sugar for a delicious and visually appealing meal that is sure to impress your guests.
FAQs for Ultimate Sourdough Starter Recipe: Easy & Foolproof
Can I use all-purpose flour instead of whole grain flour for the initial start of the sourdough starter?
Yes, you can use all-purpose flour if you don’t have whole grain rye or wheat for the initial start. However, fermentation may go a bit slower compared to using whole grain flour.
How do I know if my sourdough starter is active and ready for baking projects?
A healthy starter will develop a pleasantly sour, slightly fruity aroma as the beneficial microbes thrive. When the mixture doubles in volume and a spoonful floats in water, it’s typically active and ready for baking projects.
What should I do if my sourdough starter develops a dark liquid on top?
If your sourdough starter sits for more than a week without use and develops a dark liquid on top, it’s normal. Simply pour off the liquid, feed the starter, and then refrigerate it before using it again for best results.
Can I refrigerate my sourdough starter if I don’t bake frequently?
Yes, if you don’t bake frequently, you can refrigerate your sourdough starter. Remember to feed it weekly and allow it to come to room temperature before feeding for best results.
Conclusion
As you embark on your sourdough journey with this Simple Sourdough Starter Guide, remember that creating and maintaining a starter is an act of patience, love, and tradition. The rewards of baking with your own wild yeast are truly special and worth the effort. Embrace the process, enjoy the aromas, and savor the flavors that come with each loaf you bake.
Whether you’re a seasoned baker or new to the world of sourdough, this guide is a great starting point to dive into the art of creating and nurturing your very own sourdough starter. So keep feeding, baking, and experimenting with your sourdough creations. The possibilities are endless, and each loaf you bake connects you to a rich history of breadmaking. Happy baking with your Simple Sourdough Starter Guide!
📌 Pin for later!
Ultimate Sourdough Starter Recipe: Easy & Foolproof
“Capture the magic of wild yeast with this simple sourdough starter guide—nurture and create endless loaves of homemade bread with robust, earthy flavors.”
Prep Time20 Minutes
Cook Time~ undefined
Total Time20 Minutes
CuisineArtisan baking
Skill LevelEasy
Servings7 Servings (Sufficient mature sourdough starter for multiple bakes)
Ingredients
For the sourdough starter
- 1 litre filtered or spring water, at room temperature
- 100 g whole grain rye flour or whole wheat flour, preferably organic
- 500 g all-purpose flour, unbleached and preferably organic, for feedings
Instructions
-
Prepare the Starter Jar: Weigh the clean, empty glass jar in grams and label it with the current date for tracking purposes.
-
Day 1 – Combine Initial Ingredients: Combine 100 g whole wheat or rye flour and 100 g water in a jar. Mix well with a fork until thick and homogeneous. Scrape down the sides, cover loosely, and secure a rubber band around the jar to mark the starter’s height. Let it sit at room temperature for 24 hours.
-
Day 2 – Observation: Check the starter for minimal activity and small bubbles. Cover and let it sit at room temperature for an additional 24 hours.
-
Day 3 – First Feeding: Discard half of the mixture, keeping 100 g of starter. Add 100 g all-purpose flour and 100 g room temperature water. Mix well, scrape sides, cover loosely, and allow to rest at room temperature for 24 hours.
-
Day 4 – Continued Growth: Remove all but 100 g of starter. Add 100 g all-purpose flour and 100 g room temperature water. Stir, scrape down sides, cover loosely, and let rest at room temperature for 24 hours. Repeat feeding if growth slows.
-
Day 5 – Bubbles and Rise: Leave 100 g of starter in the container. Add 100 g all-purpose flour and 100 g water, stir well, scrape down the sides, loosely cover, and let it rest for 24 hours.
-
Day 6 and 7 – Active Starter Development: Every day, discard all but 100 g of starter. Feed with 100 g all-purpose flour and 100 g water, mix well, scrape the sides, loosely cover, and allow to double in size.
-
Assess Starter Readiness: To test if the starter is ready, drop a spoonful into a bowl of water. If it floats, it is ready to use. If it sinks, continue discarding and feeding daily until it shows appropriate activity.
-
Ongoing Maintenance: For regular bakers, feed the starter daily at room temperature, discarding as needed, and allow it to peak for 4–6 hours before using. For occasional bakers, refresh the starter weekly by discarding, feeding, resting at room temperature for 1–2 hours, and then refrigerating again.